
Guide: Pro Tips for Muramasa Rebirth
 In Muramasa Rebirth the real fun begins once you’ve seen the game’s end credits for the first time. This is also where the real challenge starts. I’ve put together a full guide detailing what you can (and should) do next that can be viewed here, but you’ll also want to know how to do it. Read on for pro tips as well as advice for the game’s toughest bosses.
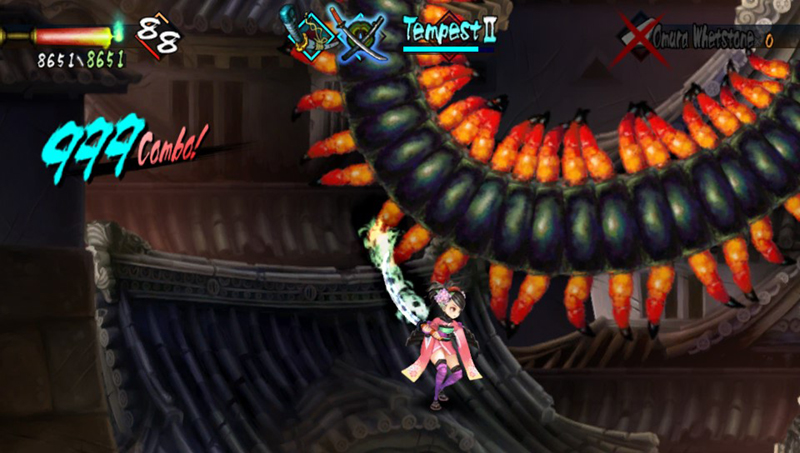 Spamming Secret Arts. The secret to Muramasa lies in knowing how to abuse your Secret Arts. By continuously chaining them together you can unleash devastating combos with immense ease, whilst making yourself temporarily invulnerable at the same time.
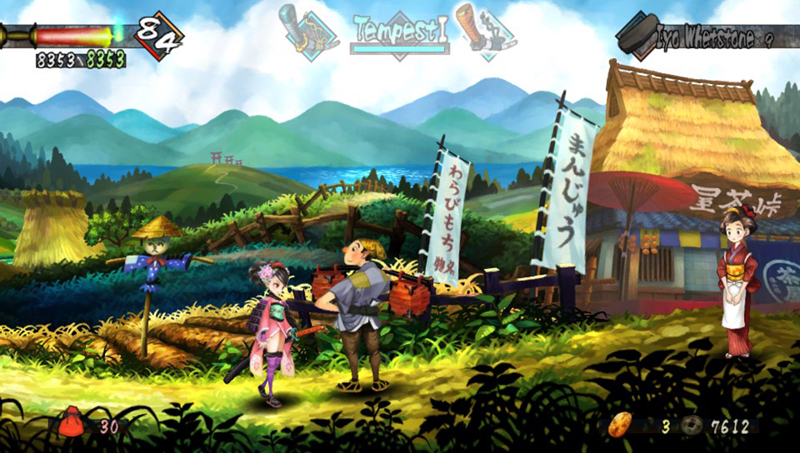
Secret Arts use up spiritual energy, but a lot of non-boss fights will be over before your sword breaks. You’ve also got three swords in total so three spiritual energy bars to use up (see below for help on equipping the right weapons). Against bosses you can use Whetstones to constantly refill your spiritual energy, or temporarily stop it from depleting. These can be bought from traders across the game’s map, with full details of where to find them below.
If you’re playing on Legend mode (and I’d recommend you do) then your character auto guards enemy attacks, and this damage is substituted against your spiritual energy, rather than your health. Because of this there’s little point in showing any restraint when using both Secret Arts and Whetstones. Every second you’re not using your spiritual energy to perform Secret Arts you risk having it depleted anyway by your opponents. Using Secret Arts constantly may use up a lot of Whetstones, but you’ll be dealing a huge amount of damage, killing bosses quickly and efficiently, and performing massive combos that will level you up fast.
 Where to buy Whetsones:
Omura Whetstone 1 sword 50% (85 mon)
Suruga (Momo), Mino (Kisuke)
Iyo Whetstone 1 sword 100% (110 mon)
Shinano (Momo), Mikawa (Kisuke)
Igarashi Whetstone 3 swords 50% (250 mon)
Mino (Momo)
Joukenji Whetstone 3 swords 100% (400 mon)
Yamashiro (Momo), Shinano (Kisuke)
Uchimori Whetstone Stops spiritual energy from decreasing (500 mon) Ise & Yamato (Momo), Suruga & Musashi (Kisuke)
The Whetstone Run. After every few Caves of Evil/other boss fights I’d recommend travelling across the map and stocking up on each type of Whetstone. As you can only carry nine of each it’s worthwhile having all the different kinds, despite the fact that some Whetstones are better/cheaper than others. As a rough guide most bosses can easily be defeated using between five and ten Whetstones, although there are a few exceptions (see Boss Tips below).
Fight the other character’s bosses. If you’re completing the Caves of Evil and using lots of Whetstones you might find that the traders aren’t restocking them quick enough. You can reset their stock levels by either re-fighting one of your bosses, or fighting one of the bosses originally designed for the other character. These are marked as ‘?’s on the map and are great opportunities to level up without it feeling like a grind. If you’re interested in Trophies then this will help you find all the barriers on the main road, and each boss also drops a different accessory.
Fast Traveling. Once you’ve completed the game you can fast travel between areas by talking to the Kitsune (Fox deity) at the shrines where you save the game. When you’re far away from any you can use a Bronze Mirror to return to the last shrine you visited. These can be purchased from pretty much every trader in the game, and it’s worth always having a few on hand to help save time travelling. Once you’ve defeated the Sea Monster (see Boss Tips below) you can take the boat from Izu another time where you’ll encounter a mermaid who will give you the Mirror of Wisdom, which has the same function as a Bronze Mirror but can be used unlimited times.
Eating Peaches. Each ten levels equates to roughly an additional 1,000 HP. This means that by the time you face the final Cave of Evil you’re likely to have around 9,000 HP, and you’ll need it. Unfortunately most of the items you’ll find across the man wont recover even a small portion of this massive number. Stock up on Peaches, these restore 2,000 HP each and they’re the best recovery item you’re going to get. Even then you may need a few to fully top up your HP, but they’re cheap and can be bought from every trader.
Equip the right stuff. You already know that spamming Secret Arts is the key to victory, but which secret arts should you spam? I’d recommend experimenting to find your own favourite, as there’s no definitive answer. My personal favourite is Tempest II as it’s a very powerful attack that damages enemies from all angles, and you have full horizontal control of your character whilst executing it. For this art you’ll want to equip The Threads of Fate sword, which is unlocked by completing the game as Kitsune and it can be equipped by either character after roughly level fifty.
You’ve also got space for two other swords. I like having Tempest I available too (the sword for this is Bizenosafune Kanemitsu) as although it’s not as powerful as Tempest II, it uses a separate spiritual energy bar so can help reduce Whetstone consumption. Whatever Secret Art you decide works best for you, I’d recommend equipping all different versions of it at the same time.
Whilst some secret arts have three versions, Tempest only has two, meaning that if you decide to use it you’ll have a spare slot. I liked to mix up what sword I use here, and would generally use something with a powerful attack stat and decent Secret Art. As you level up you’ll be able to equip more and more powerful swords, so why not use this slot to try out your new unlocks.
When it comes to choosing an accessory I’d also recommend finding something that works best for you. Many items boost your base stats, meaning you can equip new swords even if you’re slightly under-levelled, which is always useful. Later on you’ll unlock a couple of accessories which constantly replenish your health, and these can be exceptionally useful as items will become a more and more impractical way of healing as your HP stat increases. The Toyama Elixir, which is unlocked after completing Battlefield of the Damned Cave of Evil (located in Shinano) is the accessory I’d recommend for the final portion of the game. For my full list of the game’s accessories, and where to find them, please click here.
 Boss Tips. Spamming Secret Arts will get you through almost all of the game, but there’s still a few exceptions. Below I’ve outlined the hardest bosses in the game with specific tips on how to defeat them.
Sea Monster (recommended level: 40) This is an optional boss that will unlock you a Silver Trophy. It’s found by taking the boat at Izu (it won’t show up the first time, but will every time after that till you defeat it). It’s a unique and tricky battle as you can’t use Secret Arts and have only 60 seconds to complete it in before the monster disappears and you’ll have to try again. I’d recommend equipping regular swords and not longswords, as their air attacks end in a spin that is particularly effective against the Sea Monster’s tentacles.
When the battle begins, jump off the boat, perform your air spin attack by mashing the square button and spin downwards into the sea dealing lots of damage to the Sea Monster’s tentacles in the process. Now you’re in the sea, and you’ll need to mash square some more to get out of there. At this point you’ll be propelled into the air again, but rather than aiming to land for the boat, air spin attack back down onto the tentacles. You may have to do a couple of practice runs to get this just right, but before long you should be able to cut lots of tentacles with each air spin. All you have to do now is deal enough damage within the time limit and eventually the Sea Monster will withdraw and accept defeat.
Final Boss #2 (recommended level: 50) You’ll need to be level 50 to equip The Threads of Fate and Descent into Misery, but once you can you’re good to go. The final boss has now changed, and although it’s technically different for both characters, the same strategies apply to both. Your opponent can block most of your attacks, including your Secret Arts, which might throw you off a bit at first. You’ll need to break their sword which is most effectively done by simply using a few regular attacks, then when their guard is broke you can unleash as many Secret Arts as you can in quick succession. If you do have trouble, you can still complete this fight by simply spamming Secret Arts, but you’ll have to use quite a lot of Whetstones.
Night of Absolute Chaos (recommended level: 92) The final Cave of Evil, and also the hardest one. This is a really long fight, so bring a lot of healing items, and a lot of Whetstones. There’s a very real chance that you might run out, so to combat this I’d recommend stocking up to the max and buying nine of every kind. Even then I’d advise saving them for the later rounds, and to be honest the first few waves of enemies are pretty easy. Because of this I’d recommend having at least one sword equipped that has a really high attack stat. Personally I used the Oboro Muramasa. Once you reach the really large enemies (just after you face the spirit monsters where you have to reflect their attacks back at them) you can start to really spam your Secret Arts as these bosses have a lot of health.
The final round is the most challenging, and you’ll be facing both character’s Final Boss #2 at the same time. The skills you used then still apply, and if you’ve got the Whetstones left then don’t be afraid to use them, especially when their swords are broken it’s important to inflict as much damage as possible. Once you’ve got the technique down, it isn’t too hard, and by the time I replayed this cave as the second character I was surprised at how much easier I found it.
Final Boss #3 (recommended level: 90) To be honest, compared to Night of Absolute Chaos, the third final boss really isn’t that hard. Each character faces a stronger version of their first boss, meaning Momohime’s is a little trickier than Kitsune’s. Simply bring a lot of Whetstones, as it’s only one fight so there’s no real need to pace yourself. Spam your Secret Arts for all they are worth, the end is in sight!

About Dracula’s Cave


Recent Comments