



The Ultimate Cable Guide – How to get the best picture from your retro games (part I)
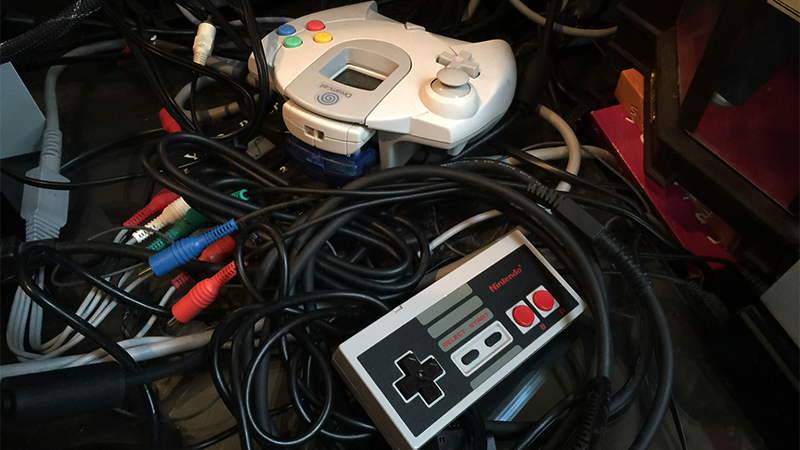 If you've ever tried to plug your old Super Nintendo or Mega Drive into a modern, High Definition television, then it's likely that you were quite horrified with the results. Without the right set up, and the right cables, retro games don't look good – especially on new TVs. But working out what kit you need, and what will work best for you, can be more than a little confusing. That's why I've put together this guide, which starts with the basics but also covers all the complicated stuff you’ll need to help get the best picture from your retro games.
Step one is making sure you have the correct cables. There are a number of different methods of outputting video and the picture quality you’ll see as a result can vary drastically. Below is a rough hierarchy outlining the good, bad, and ugly of video signals.
 SDTV Cables – These are the cables that you'll want to connect your console to a standard definition 'CRT' TV with. Whilst you can also use them with a HDTV, without an upscaler the results won't be pretty. These cables do not carry higher resolutions and most old consoles don't output them anyway. In fact many retro consoles output below Standard Definition (480i NTSC/576i PAL) at around 240p, which looks nice on a smaller TV, but not so great on a larger one.
 HDTV Cables – Do you own a High Definition television? Good. Using these cables you can take advantage of the additional resolution these TVs support, and enjoy an impressive picture on newer videogame consoles. Again, you can technically display all bar the HDMI on an old CRT (this may require adapters), but even with all the correct kit there's minimal room for improvement over RGB SCART.
The Rundown:
1. RF Adapter – The oldest (and worst) way of outputting your retro console. The RF Adapter simulates a Radio Frequency broadcast which can be picked up by an SDTV. The connection is prone to interference and produces poor audio and video quality. This cable was provided in box for a large amount of systems, so if you're a retro gamer there's a good chance you've got some kicking about. Don't use them.
2. Composite video – A composite cable splits the video stream (yellow) from the left and right audio (white and red). This is an extremely common output method, but although it produces a clearer image than an RF Adapter the video is only encoded in one channel, which still results in a blurry and relatively low quality picture.
3. S-Video – S-Video is an improvement over Composite as it splits the video into two channels resulting in a sharper image. It’s at this point your picture quality stops being completely terrible, but for the majority of consoles that support S-Video there are still better options available.
A note about SCART
SCART was used as a standard in Europe, and if you live here you probably know what it is. But if you’re from America you might have never heard of it, and if you have what you may have come across is RGB SCART. It's often talked about as RGB SCART is widely considered to deliver the best picture for many retro consoles. What makes SCART confusing is that the connector can carry one of several formats also including S-Video or Composite.
By simply looking at a SCART cable it can be quite difficult to work out what video format it carries, and the only real way to be certain is to open it up. However a good indicator is the number of pins it has; if it's missing pins it won’t have enough channels to carry RGB. The other general rule is that if you’re not sure, your cable probably doesn’t support RGB. It's a specialist function designed to achieve the highest picture quality, was not supplied in box with consoles outside France, where SECAM televisions meant RGB SCART cables were bundled as standard, and was sold as a premium cable. You’d probably know about it if you’d bought one.
4. RGB SCART – With a RGB signal the video is carried over four channels; red, green, blue and sync. This produces greater clarity than the previously listed formats, and as RGB is natively outputted by most retro consoles the resulting picture is delivered without compression. SCART was the main consumer video cable standard that supported RGB, and it’s the best video format for any console made before the Dreamcast, although not every system outputs it natively.
5. Component – Component video is often confused with RGB SCART, but it’s a completely different signal (called YPbPr) that splits the video into luminance (brightness/white levels) and two colour channels. On a SDTV YPbPr doesn’t produce the same depth of colour as RGB SCART, but YPbPr supports higher resolutions as well as progressive scan. Component is what you'll want to use for connecting consoles that support higher resolutions than SD to a HDTV (unless of course they output full HD via HDMI). In other words it's great for connecting a Nintendo Wii, GameCube, PlayStation 2 or original Xbox to a HDTV.
6. VGA – Most commonly used for computer monitors, VGA carries the same colour space as RGB SCART, but it also supports higher resolutions that look great on a HDTV. The only console you’re likely to use it with is the Dreamcast, and VGA is not only the best option for SEGA’s machine, but it’s also the only way to output the console in 480p.
7. HDMI – The standard for modern consoles, HDMI outputs at a higher resolution than the previously mentioned formats and allows for a great looking picture on massive, High Definition televisions. Unlike the previous formats, HDMI is a digital output meaning that the quality of the cable and the quality of the connection does not affect the picture.
So which is best? – The short answer: For any console made before 1998 you will get the best result outputting on a CRT or RGB monitor using an RGB SCART cable. Notable consoles that don’t support this without modification are the NES, Nintendo 64, NTSC GameCube and NTSC Wii. The PS2, original Xbox and PAL GameCube/Wii will look great on a SDTV using RGB SCART, and they’ll also look nice on a HDTV with component output. Likewise the Dreamcast looks great using RGB SCART for SD, but for a HDTV you'll want to use a VGA cable.
Which is best – Individual systems (the long answer):
NES – The NES doesn’t support RGB natively, but you can get an image unmatched in quality if you don't mind performing a significant modification. The best you can otherwise get is composite video (with mono audio), but on a decent CRT or PVM this doesn’t look as bad as you’d imagine. For this you’ll need a Model 1 NES, as the NES-101 (the top-loading model) only supports RF on all but a few extremely rare variants. If you're a big NES fan, it may be worth looking into a service where you can get your console modded and then use RGB SCART.
SEGA Master System – The Master System supports RGB SCART and produces a fantastic picture. However, the remodelled Master System II only supports RF output in most territories – the French model keeps an RGB-capable A/V port instead. It’s also missing the card slot used for many of the system’s accessories, making the Master System I the version you'll likely want for your collection.
SEGA Mega Drive/Genesis – The Mega Drive also supports RGB SCART, and the Mega Drive I can even use the same cable as the cable Master System I. However, the console only supports stereo audio through the headphone jack, and you'll need a different cable that connects to both this socket as well as the A/V out if you don't want mono sound. The Mega Drive II also supports RGB SCART, but requires a completely different cable.
 Although the Mega Drive is notorious for its incredibly poor composite output, it does also highlight a flaw with RGB SCART. Game designers often took into account the poor quality of videogame cables and used it to their advantage – by putting thin strips of colour next to each other they exceeded the hardware's natural colour limits and added further effects such as transparencies. This process is called dithering, and when using higher quality equipment its effect doesn't work, and elements such as gradient backgrounds, or the transparent tubes in Sonic 2's Chemical Plant Zone appear in their original form. The Mega Drive was the biggest culprit for this process as it was competing against the SNES, which had both a larger colour palette and its own transparency effects. However, as previously mentioned the Mega Drive did not output composite well. Therefore RGB SCART would still by my recommendation, even if certain effects no longer function correctly.
Super Nintendo – The SNES model 1 outputs RGB SCART without modification. Meanwhile the SNES Mini requires modification, but the resulting RGB SCART image is reportedly superior. Of course this system was never released in Europe, and the games are region locked, so depending on where you’re from may factor in to deciding which option will work best for you.
SEGA Saturn – The Saturn supports higher resolutions than the previously mentioned consoles, but we’re still well within the realms of Standard Definition and RGB SCART will happily carry its output. Running on a CRT, this produces a great picture for both the Saturn’s 2D and 3D games.
PlayStation – The PlayStation outputs a 240p image that will look great on an old CRT. You’ll want a (you guessed it) RGB SCART cable to get the best image possible. If you’re interested in playing old PlayStation games on a modern TV you'll probably want an upscaler, although emulation through the PS3 is by far the easiest option. Sony’s emulator has its own upscaling options that help bring the picture quality up to an acceptable standard.
Nintendo 64 – Unfortunately the Nintendo 64 doesn’t support RGB without an advanced modification, and even then only some consoles can be modded at all. If you’re a big Nintendo 64 fan then it may be worth looking into this, otherwise the best you can hope for is S-Video on an NTSC system or composite on PAL. An alternative to modding would be to use the Virtual Console on the Nintendo Wii, although for anyone nostalgic for some Nintendo 64 action this is hardly a full solution.
Nintendo GameCube – The GameCube supports component output but the cable required to achieve this was only ever sold through Nintendo's online shop and is both notoriously rare and expensive (I bought mine for £55 about 4 years ago and currently they cost around £150). I've heard rumour that some later models of GameCube don't have the digital port required, although at least in the UK these don't seem to be too common. Of course if you're missing the port then a new console would cost only a fraction of the cable.
Component output allows for a crisp 480p image, although many supported games require you to hold the B button whilst loading to enable progressive scan. This allows for picture quality on par with the Nintendo Wii.
If you live in Europe, RGB SCART is another great option for the GameCube, especially if you're using an old CRT which will benefit from the increased colour fidelity. It's certainly a cheaper alternative, and the Wii can be used to play GameCube games on your HDTV if you're on a budget. Unfortunately only the PAL GameCube supports RGB SCART without modification. This also means the Panasonic GameCube will do component but not RGB SCART.
Dreamcast – The Dreamcast was ahead of its time in many ways, one being that it could output in 480p. Achieving this originally required a VGA box - an item that was both rare and hard to come by, but now there’s a simple cable that will do the trick and it's readily available online. A lot of Dreamcast games look great on a HDTV, although not all were designed for use on such large televisions. It can really vary on a case by case basis, and some titles will certainly look superior outputting RGB SCART on a CRT, but personally I’m a big fan of the crisp image that the VGA output produces.
The other issue is compatibility; not all games support VGA. There’s a primitive workaround for games like Hydro Thunder, where you can plug the cable in as soon as the disk check has been completed, but this is hardly a full solution. The counter issue is that many PAL Dreamcast games suffer from slowdown when outputting at 50hz. This issue is resolved when using VGA as the game displays at 60hz, and for a game like Sega Rally this is the only way to play the game at full speed.
Xbox – RGB SCART is what I personally use for my original Xbox, although component cables are available if you’re interested in plugging the console into a HDTV. Many original Xbox games are also compatible with the Xbox 360, and this is another easy way to play them on your HDTV. I prefer to use RGB SCART as many of the best Xbox games have low quality textures, and look poor when displayed on a large television.
PlayStation 2 – The PlayStation is another console where you have the choice between outputting through component on a HDTV, or via RGB SCART on a SDTV. As with the Xbox, my personal choice is RGB SCART although this time there are a few further advantages. The PS2 has some excellent 2D games (Guilty Gear X2, Odin Sphere, Disgaea etc) that look simply stunning on an old CRT, but don’t look as good on a HDTV. The system also has almost full compatibility with the original PlayStation’s library of games, and on a CRT through RGB SCART these will output at their optimum definition of 240p. Again, these won’t look so great on a large HDTV. Finally there are further methods of playing PS2 games on a HDTV through a PS3, and the PS2 Classics range can be upscaled to 720p.
Nintendo Wii – Component output is a safe bet for the Nintendo Wii, although it also supports RGB SCART if you’re interested. Almost all Wii games support 480p and as the original Wii can also play GameCube games – the 2011 Family Edition and the Wii Mini cannot – it’s a great option for playing them on a HDTV without buying the £150 cable mentioned earlier. If you have a large library of virtual console titles it may be worth hooking up your system to a CRT via RGB SCART instead however, as this will give a stunning picture and high quality of emulation for games across a variety of different retro systems. These don’t look half bad on a HDTV either however, and if you do want to play retro games on a modern television then it’s certainly an easier and cheaper option over purchasing the kit required to upscale the image from the original consoles and bring the picture quality to a similar standard.
There are numerous third-party adapters such as the Wii2HDMI converter that allow the Wii to connect to your TV via HDMI. It's worth noting that this piece of kit won't provide a true 1080p output but instead carries the same 480p signal you'll get using a Wii component cable. Although it won't provide an improved picture quality, if your goal is simply to connect the Wii via HDMI then this will do the trick.
Everything newer – HDMI.
Okay, hopefully that covers everything cable wise. I know there's a few consoles missing from this list (generally those of less historical significance) and it's currently limited to the systems I own. I'll update it if I buy anything new.
In the meantime our journey towards the ultimate retro picture is far from over. Whilst you should now know which cables you'll want, we still need to talk about what you'll be plugging them into, how you'll manage to connect ALL these wires into the TV at once, and any possible alternatives to a labyrinth of cables and fifteen year old broadcasting equipment combo. Read on with part II here.